The dog days of summer are soon approaching if you haven’t already started to notice lazy, bored, electronic bug eyed kids moping around your house. The good news is that it’s still not too late to make some wonderful memories this summer before school starts!
Even if you have never done it yourself, why not learn something new along with your kids? Fishing can be intimidating because of all the tackle and supplies you think you might need:

The truth is, this much tackle just simply isn’t needed for you to take your kids on a day trip down to your local pond, river bank, or lake. There are only a few basic, inexpensive things you are going to need.
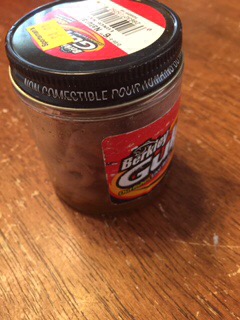
First of all, lets get the subject of bait out of the way, which would be the second most intimidating thing about fishing! Live worms work well for many different types of fish and areas you fish from, which can be purchased pretty much wherever tackle is sold. If live worms are just out of the question for you, I would suggest fake worms such as these:

If your kids received a snoopy fishing pole from Grandpa last year for their birthday, believe it or not, these are the best for learning on. I would suggest spending a few hours in your backyard and practice throwing your line out (casting).
Most kids can fish without a license, however, licensing and regulations are different in every state, so I would suggest visiting your local sporting goods store and/or fish and game to inquire regarding all of the rules.
Tackle can be very simple and basic for your first fishing trip. First, you will need a stringer (this is a string with a metal stake at the end to string through the gill and mouth of the fish you catch, you can tie this to the bank and keep the fish fresh in the water while you continue to fish for more).
You will also need the following:
Line, 8 lb. test, we like Berkely! The test is the approximate amount of pounds the fishing line can withstand before it snaps apart.
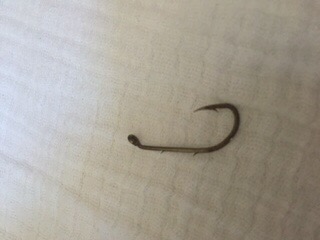
Hooks, barbed, size 6 (again, check local regulations, some areas don’t allow barbed hooks):

Split Shot Weights: (There is a slit in the middle of these, so you can just crimp on as many as you need to keep your hook and bait weighted down to where the fish are hanging out)

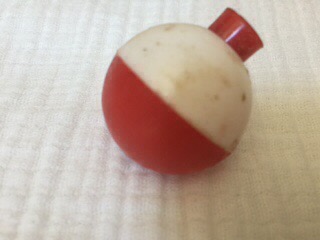
Bobbers: (These will “bob” under the water when a fish bites your hook)
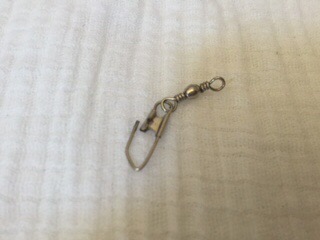
Swivels: (These allow the end of your line to “swivel” all the way around and not tangle your line as easily)

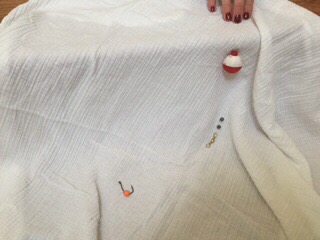
Your bait will be pierced into the end of the hook where the orange bead is in the pic below and your tackle will be in this order on your line, spaced out appropriately,of course. The bobber will be floating on the top of the water, while everything below it will be under the water. It’s also a good idea to brush up on your knot tying skills: Knot Tying Pdf

💚Consider packing a picnic lunch for a day trip, stay hydrated, apply sunscreen, and always bring your first aid kit along.
You will need a pair of needle nose pliers or a Leatherman tool to remove the hook from the fish’s mouth as soon as you reel them in. You can clean and gut the fish when you get home. It’s always a fun experience for the kids to cook their catch and eat it too. Foil packets on the grill with butter, salt and pepper make any freshly caught fish so tasty.
One of my greatest memories of fishing with my babies, we had put the girls in the pack n play with all of their toys right next to us on the bank of the Boise river. Every time, we caught a fish, the girls would insist on kissing it before we could add it to the stringer!
Keep in mind, fishing all on its own are the memories made whether you do it right or wrong, or catch anything or not. Now, off to the lake, don’t be scared!
Here is the link to the printable list of essentials:
Printable Fishing Essentials Link

 We went school shopping this past weekend and in my haste to buy the limit on everything Crayola, I rushed by the clearance rack that happened to be riddled with all the things having to do with canning. Mason jars galore with wide mouths and lids of any variety. I began to daydream of all the little collections of things one could store in a Mason jar. The jars are a perfect container for an essential craft kit for kids of all ages. The lids are easily removed and what kid can resist a jar full of brand new colorful, sharp crayons and markers?